

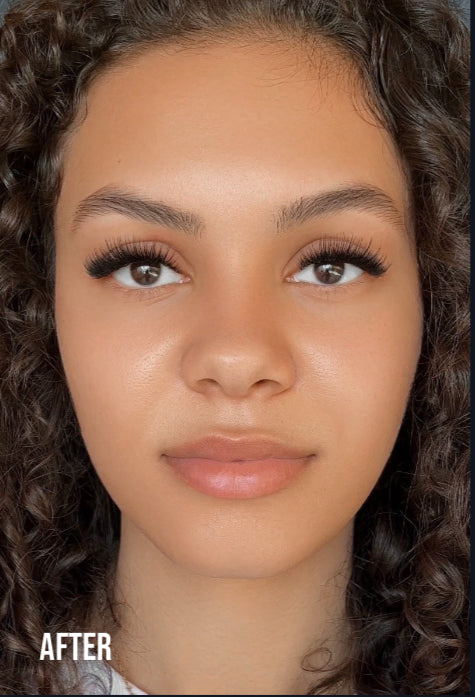
How to Map Your Clients’ Lash Extensions: Custom Lash Mapping Guide for Every Eye Shape
Learn how to map lash extensions with our custom lash mapping guide. Tailor sets to every eye shape, balance symmetry, and elevate your artistry
CUSTOM MAPPING: EYE SHAPE & SYMMETRY

When it comes to mapping lash extensions, cookie-cutter templates won’t cut it. Custom lash mapping is essential for creating perfect sets tailored to every eye shape. The secret to delivering transformative results and building a loyal clientele - is understanding the art and science of custom mapping. It’s not just about applying extensions, it’s about tailoring each lash to the unique anatomy of your client’s eyes.
Whether you’re a beginner lash artist searching for how to map lash extensions or a more experienced artist looking to level up, mastering lash mapping for eye shapes is non-negotiable. In this blog, we’ll dive deep into custom mapping, how to identify and enhance eye shapes, how to map lash extensions, techniques for adjusting lash lengths for symmetry, and essential lash artist consultation tips that set the tone for every appointment.
WHY CUSTOM MAPPING MATTERS?
Every face tells a different story - and no two eyes are exactly the same. As lash artists, we’re not just enhancing beauty; we’re sculpting balance, framing the face, and correcting asymmetry where needed. Custom lash mapping is your blueprint to achieving all of that.
A well-designed map is more than a guide; it’s a strategy. It ensures you apply the right curls, diameters, and lengths in the right zones to flatter the natural eye. Knowing how to customize lash extensions for your client’s eye shape isn’t just a trend - it’s an elevated skill that sets artists apart in a saturated market.

UNDERSTANDING EYE SHAPES
Before you even pick up your tweezers, take a moment to study your client’s eyes. This is where your knowledge of eye shape comes into play. Here are a few common shapes and tips on how to customize lash extensions for each client’s eye shape:
Almond Eyes
This is considered the most balanced eye shape and can typically wear any style. With almond eyes, custom mapping is flexible - you can get creative with volume, wisps, or even eyeliner effects.
Round Eyes
To avoid an overly surprised look, focus on elongating the eye. Use longer lengths on the outer third and softer curls overall. Lash extension mapping guide suggests adjusting lash lengths for symmetry can help tone down any roundness and give a more sultry appearance.
Hooded Eyes
For clients with a heavy lid, visibility is key. Use stronger curls like D curl or L curl to lift the lashes up and out from beneath the fold. How to map lash extensions here means emphasizing lift in the mid-section, drawing attention to the center of the eye.
Monolid Eyes
These require a strategic curl and length combo. Strong curls and a spiky texture can create dimension, while lash mapping for eye shapes can help create the illusion of a lifted, more open eye.
Downturned Eyes
Avoid dragging the eye down further. Focus on a lifted “kitten-eye” or “eyeliner” effect, but make sure the longest lengths sit just before the outer corners to lift. When adjusting lash lengths for symmetry, make sure you correct any natural droop subtly without exaggerating it.
Close-Set vs. Wide-Set Eyes
For close-set eyes, use shorter lengths toward the inner corners and gradually increase to elongate the eye. For wide-set, do the opposite - shorten the outer edges to bring balance.
Understanding these shapes is your foundation for excellent custom lash mapping, and knowing how to customize lash extensions for your client’s eye shape will set your sets apart from the rest.
ADJUSTING LASH LENGTHS FOR SYMMETRY
Perfect symmetry is rare. Most clients don’t even realize their eyes are slightly different until they see side-by-side photos. That’s where your expertise in adjusting lash lengths for symmetry becomes critical.
Here’s what to watch for:
-
One lid sits lower than the other: Add slightly longer or curlier lashes to the lower eye to create balance.
-
One eye is rounder or more open: Use flatter curls (e.g., B curl or C curl) to tone it down, and more dramatic curls (e.g., D curl or L curl) on the opposite eye.
-
Different natural lash growth: Adjust the density, curl, and volume to create the illusion of identical fullness. You could also leave a few natural lashes bare on the eye with more natural lashes to help keep the eyes balanced.
Documenting these small asymmetries during the consultation phase, as part of your lash extension mapping guide, will help you plan your map more effectively and deliver a perfectly balanced final look.
LASH ARTIST CONSULTATION TIPS: BUILDING TRUST FROM THE START
The most successful sets begin long before the first lash is applied. The consultation is where your client feels seen, heard, and understood. These lash artist consultation tips will help set the tone for every appointment:

Observe Before You Ask
Take a few moments to quietly observe your client’s eyes before diving in with questions. Identify any asymmetries, eye shapes, and natural lash patterns.
Ask the Right Questions
Rather than just “What style do you want?”, try:
-
“Do you wear makeup often?”
-
“Tell me about your style.”
-
“Do you want your eyes to appear bigger, more lifted, or elongated?”
-
“Do you prefer something soft or dramatic?”
This guides you toward a more tailored map and shows your expertise in how to customize lash extensions for your client’s eye shape.
Manage Expectations
Clients often come in with inspo photos that don’t match their eye shape or natural lashes. Use the consultation to educate them and explain how custom lash mapping will deliver a look that flatters them personally - not just the person in the photo.
Discuss Symmetry

Use a Rëflekt lash mirror and a hand mirror and gently point out any natural asymmetries. Then explain how you’ll be adjusting lash lengths for symmetry to correct or enhance. This builds trust and showcases your attention to detail.
Bonus Tips for Seamless Custom Lash Mapping
-
Sketch it out: Don’t rely on memory. Use under-eye pads or mapping stickers to sketch your plan, adjusting as needed once you begin applying.
-
Photograph your work: Before-and-afters not only build your portfolio but also allow you to track what lash maps work best for specific lash mapping for eye shapes.
-
Keep learning: Eye shapes, lash curls, and mapping trends evolve. Stay ahead with continued education, model work, and community feedback.

WHY REVOLÄSHION ARTISTS ARE KNOWN FOR CUSTOMIZATION
At Revoläshion, we believe that artistry lies in personalization. Our Clubhaüs members have mastered the art of custom lash mapping, blending creativity with precision to enhance every client’s natural beauty.
From adjusting lash lengths for symmetry to knowing exactly how to customize lash extensions for a client’s eye shape, our artists and educators are trained to deliver results that look as effortless as they are elevated. With innovative products, advanced tools, and continued training support, Revoläshion is setting new standards in the industry and the go-to for a lash extension mapping guide.
Custom lash mapping is not just a technique - it’s a signature. It’s what transforms good lash artists into great ones. By understanding how to customize lash extensions for your client’s eye shape, adjusting lash lengths for symmetry, and perfecting your lash artist consultation tips, you’ll offer a service that is both intentional and unforgettable.
Your maps don’t just create lash sets - they create trust, confidence, and loyalty.
Ready to take your artistry to the next level and gain more clients? Check out our blog “Gain Clients As A Lash Artist: Your First Impression” for more useful tips!
